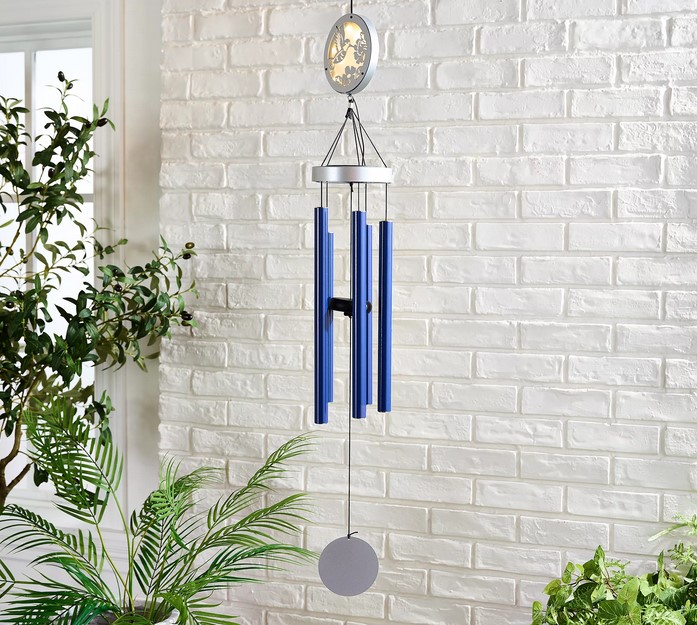
Crafting Beautiful Windchimes: A Step-by-Step Guide for Beginners
Creating your own wind chimes is a delightful and easy craft that allows you to add a touch of soothing melody to your surroundings. By combining simple materials and a dash of creativity, you can design personalized wind chimes that bring both visual charm and musical harmony to your outdoor space.

Source : https://qvc.scene7.com
Windchimes are not just delightful to the ears; they also bring visual charm and a touch of tranquility to any space. Crafting your own windchimes can be a rewarding and creative endeavor, even for beginners. With a few simple materials and a bit of patience, you can create personalized windchimes that will dance in the wind, producing soothing melodies. In this step-by-step guide, we’ll walk you through the process of crafting beautiful windchimes that will add a touch of artistry to your surroundings.
Materials You’ll Need:
1. Metal Tubes or Pipes: Choose tubes or pipes of different lengths and thicknesses to create varying tones. Aluminum, copper, and brass are commonly used materials for windchimes.
2. String or Fishing Line: Opt for a strong and durable string or fishing line that can withstand outdoor conditions.
3. Wooden Hoop or Disc: You’ll need something to suspend the tubes from. A wooden hoop or disc serves as the top of your windchime and provides a base for hanging the tubes.
4. Beads or Decorative Items: Beads, crystals, and other decorative elements can add a touch of flair and visual appeal to your windchime.
5. Drill and Bits: A drill will be used to create holes in the tubes and wooden hoop or disc.
6. S-hooks or Jump Rings: These will help attach the tubes to the wooden hoop or disc securely.
7. Pliers: Pliers will be handy for bending, twisting, and attaching various components.
8. Paints and Brushes (optional): If you want to add a personal touch, you can paint the wooden hoop or tubes before assembling.
Step-by-Step Guide:
Step 1: Design and Plan
Before you begin crafting, it’s essential to have a clear design in mind. Decide on the arrangement of the tubes, the length of the strings, and any decorative elements you want to incorporate. You can sketch your design on paper or use a design software to visualize the final product.
Step 2: Prepare the Tubes
Using a drill with the appropriate bit size, carefully create holes near the top of each tube. These holes will allow you to thread the string through the tubes. Be gentle and precise to avoid damaging the tubes’ edges.
Step 3: Paint the Tubes (optional)
If you want to add a pop of color to your windchime, this is the time to do it. Choose colors that complement your outdoor space and apply the paint evenly. Allow the tubes to dry completely before moving on to the next step.
Step 4: Attach Tubes to the Hoop
Take the wooden hoop or disc and use S-hooks or jump rings to attach the tubes. You can arrange them in a pattern or let them hang randomly for a whimsical effect. Make sure the tubes are evenly spaced and at the desired lengths to produce a harmonious melody.
Step 5: Add Decorative Elements
Enhance the visual appeal of your windchime by adding beads, crystals, or other decorative items. Thread these onto the strings between the tubes for a touch of sparkle and charm.
Step 6: Create the Hanger
Attach a sturdy string or fishing line to the top of the wooden hoop or disc. This will serve as the hanger for your windchime. Make sure the hanger is securely attached so that your windchime can withstand strong winds.
Step 7: Find the Perfect Spot
Choose a location for your windchime where it can catch the wind easily. A porch, patio, or garden area are ideal spots. Avoid placing it too close to walls or other obstacles that might obstruct the wind’s movement.
Step 8: Enjoy the Melodies
Once you’ve hung your windchime in the chosen spot, all that’s left to do is enjoy the melodies and visual beauty it brings to your space. As the wind gently moves the tubes, they’ll create soothing sounds that add a sense of calm and tranquility.
Maintenance Tips:
– Periodically check your windchime for any signs of wear or damage. Replace any broken strings or tubes to ensure it continues to function properly.
– Clean your windchime regularly to remove dust, dirt, and debris that might affect the sound quality.
– If your windchime is exposed to harsh weather conditions, consider bringing it indoors during extreme weather to prolong its lifespan.
In Conclusion:
Crafting windchimes is a delightful way to express your creativity and add a touch of aesthetic appeal to your surroundings. With a few basic materials and a bit of imagination, even beginners can create windchimes that produce enchanting melodies and enhance the ambiance of any space. So, gather your materials, follow these steps, and soon you’ll be enjoying the sweet sounds of your very own handcrafted windchime.